Running Hexamail Guard
-
This section talks you thru the process of running Hexamail Guard.
-
1) Starting the Hexamail Guard Service -
Hexamail Guard runs as a Windows Service. You can use Windows Service Control Panel to start the Hexamail Guard Service, or alternatively, launch the Administration interface and use the built in Service Control Panel to start the service. For information on starting the Hexamail Guard Administration interface, please refer to Configuring Hexamail Guard
-
2) Ongoing Hexamail Guard Administration -
There are some house-keeping tasks that it is advisable to carry out from time to time.
The following things should be checked on a regular basis:
i) The machine is connected to power and its internet connection has not failed or been removed.
ii) There is enough disk-storage remaining on the server on which the Hexamail Guard Service is running. The application will use disk to store essential information and log files.
-
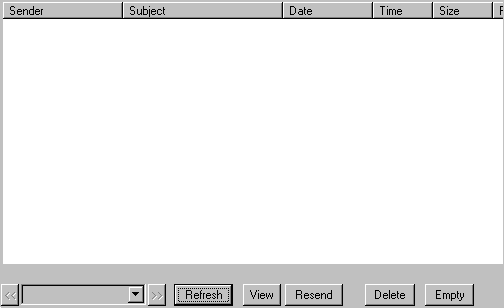
3) Checking the email stores are not over-full -
There are several email stores in Hexamail Guard. Depending on your settings, you may have chosen to store email in these stores. If so it is recommended to also configure Hexamail Guard to alert you when a specific number of email in the store has been reached. The number to the bottom left of the email list tells you how many email are held in the store. Regularly check these stores have not become over-full and are using unnecessary disk space.

-
4) Checking storage of error email -
Sometimes network errors or other problems communicating with your mail server may prevent Hexamail Guard from being able to send (relay) email. In this situation, Hexamail Guard will retry the send process 3 times by default. If the email still fails to be sent the email is stored in the Error store, when configured to do so. You can browse this store and instruct Hexamail Guard to retry to send email (right click the email to do this). You should check this store every so often, as email appearing in this store on a regular basis indicate some communications problems between Hexamail Guard and your existing mail server.

-
5) Checking for incorrectly blocked SPAM -
The SPAM blocker can very occasionally block legitimate email that are very similar in appearance to SPAM email. By quickly browsing the SPAM store you can send on any email that have been mistakenly classified as SPAM and instruct Hexamail Guard to not block that specific sender in future. Right click the email with senders you wish to always allow and choose 'Always allow sender'. Then right click again and choose 'Send'.
-
6) Checking storage of sent email -
If you have set Hexamail Guard to retain all sent email, this store will quickly build up. It is best to only store sent items while you are configuring and testing Hexamail Guard for the first time. Use the 'Store sent email' check box to turn off sent email storage.
-
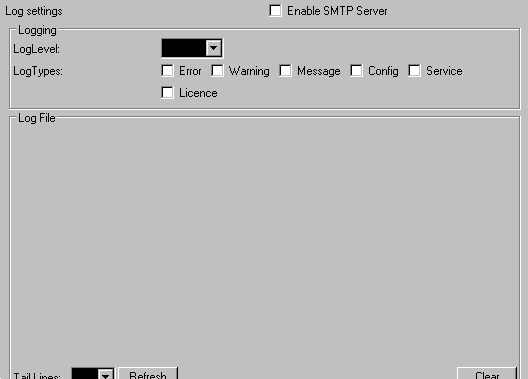
7) Checking logging parameters -
Hexamail Guard provides for detailed logging and flexible logging settings. Check you have set a maximum log file size and a reasonable maximum number of log files (Log History) for each module. The defaults are sensible, so check that any changes to the defaults made during testing/setup phase of implementation are removed/changed back.
If you haven't followed the Installation Guide then you may wish to refer to step (3) and step (4) of that guide "Configuring Hexamail Guard for the first time." If you have already done this, please refer to the documentation below: