Exchange 2016 Antispam
Exchange 2016 Antispam
Exchange 2016 built-in antispam features are difficult to manage, configure and monitor.
Hexamail Guard adds better reporting, logging and control of all Antispam filtering for Exchange 2016.
In addition it adds extra layers of spam blocking functionality including:
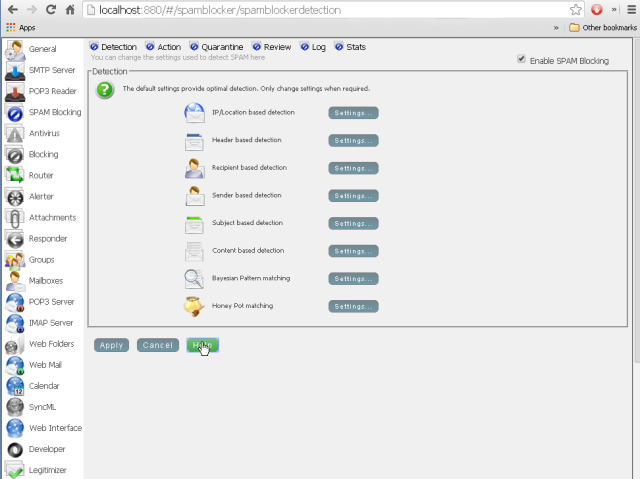
- - Bayesian content matching for detecting text spam
- - Intelligent image matching for blocking image based spam
- - Multiple DNSBL based real time blocklists
- - DKIM verification and DMARC verification
- - SPF verification
- - Built in antivirus for preventing infected documents and malware
Hexamail also offers unparalleled spam quarantine management
This guide will help you install and setup Hexamail Guard as your Antispam gateway for Exchange 2016.
Preparing
You will need:
- - a computer with plenty of disk space (>2GB) for storing email
- - a 64bit or 32bit Windows operating system (Anything over Windows XP is still supported!)
- - a permanent/reliable connection to the Internet
- - an email account on a mailserver or email provider such as Gmail, Yahoo, Hotmail, Livemail, Office365 etc
- - [Optional] an online calendar account such as Office 365, Google Calendar, CALDAV, Memotoo, Fruux etc
- - [Optional] an online contacts account such as Google Contacts, CARDDAV, Memotoo, Fruux etc
Prerequisites
You will need:
- - Administrator access or access allowing installation of software onto your computer
Installing
Next you need to download the required software and copy it to your chosen computer.
- 1) Download Hexamail POP3 Downloader and save the installer exe file and license on the computer
- 2) Run the hexamailpop3downloadersetupN.N.N.NNN.exe file by double clicking on it. if you are on a 64bit system you should download the 64bit version called hexamailpop3downloadersetupN.N.N.NNN_64.exe
- 3) If prompted (64bit) you should install both the Administration console and Windows service
- 4) You can choose the installation folder at this point
- 5) The installer copies the necessary files and creates the Windows app
- 6) Once it has finished installing files it will automatically open the configuration wizard and you can begin setting up Hexamail POP3 Downloader
Configuring Using the Setup Wizard
Now you can begin configuring Hexamail POP3 Downloader. After some initial steps you can use the Windows admin to configure the rest of the settings
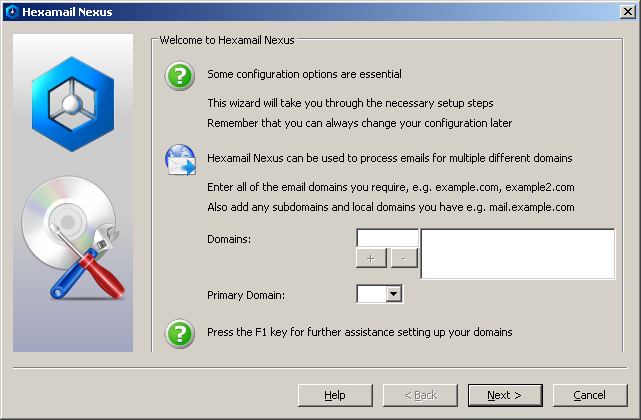
- Specify the domains that need to be routed to your mailserver. For example if your mailboxes are user1@domain.com and user2@domain.com you need to specify domain.com as a domain. You may also need sub.domain.com if you also receive email to or from user1@sub.domain.com
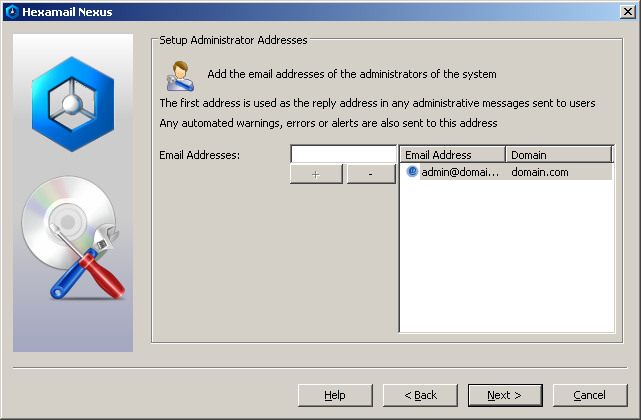
- Specify the administrator email addresses. Alerts from Hexamail POP3 Downloader are sent to all addresses on this list and the first entry is used as the sender of the alerts.
- Specify how you wish to process email. If you want to process SMTP email as it arrives at your organization choose SMTP. If you wish to download email using POP3 and IMAP, process it and send it to your mailserver specify POP3/IMAP
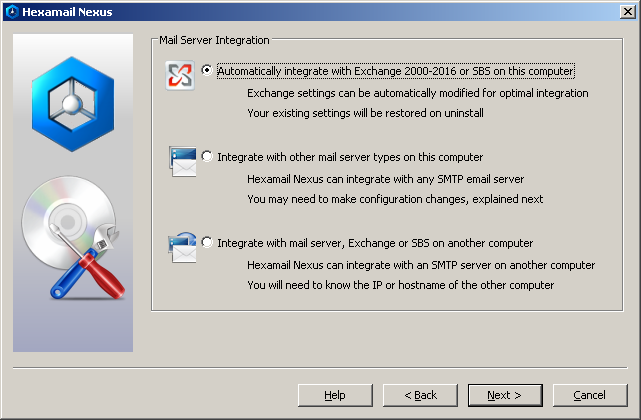
- Configure where your email server is and what type. Hexamail can automatically reconfigure Exchange if it is on the same machine as Hexamail or integrate with any SMTP server
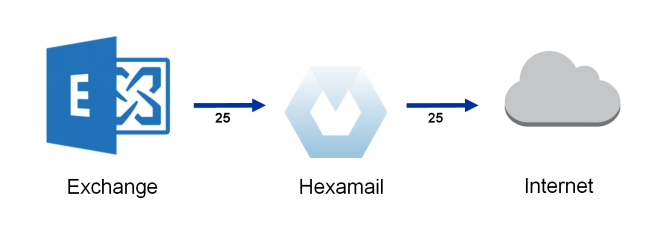
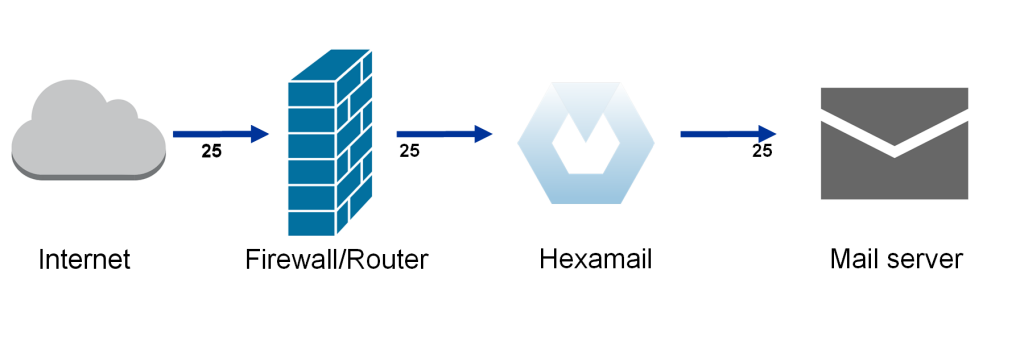
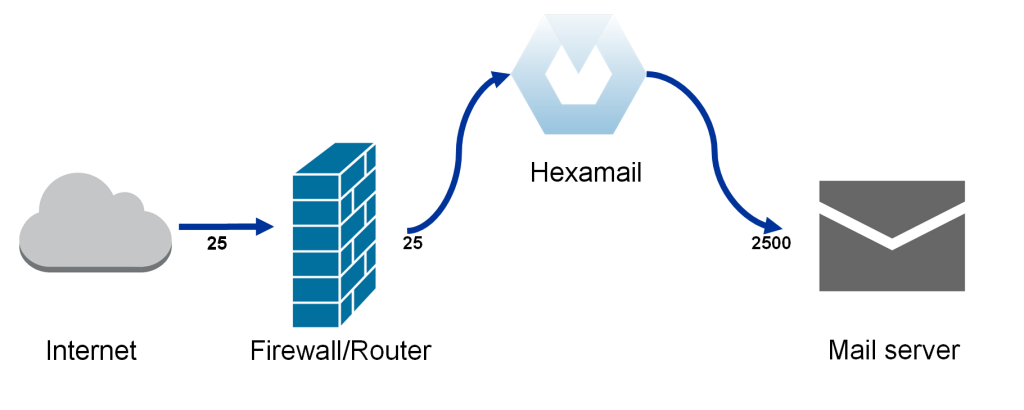
- Automatic reconfiguration of Exchange if it is on the same machine as Hexamail will try to create a new receive connector called "Hexamail Inbound" on port 2500. Hexamail will disable the existing Default and Internet receive connectors in order that email can flow to Hexamail on port 25 and then be processed/filtered and then sent on to the new receive connector on port 2500. In some configurations of Exchange this procedure may encounter difficulties, and Hexamail will alert you to this and save a powershell script required for the integration which you can run manually from an Exchange Powershell console. In any case the diagram shows the desired final setup configuration.
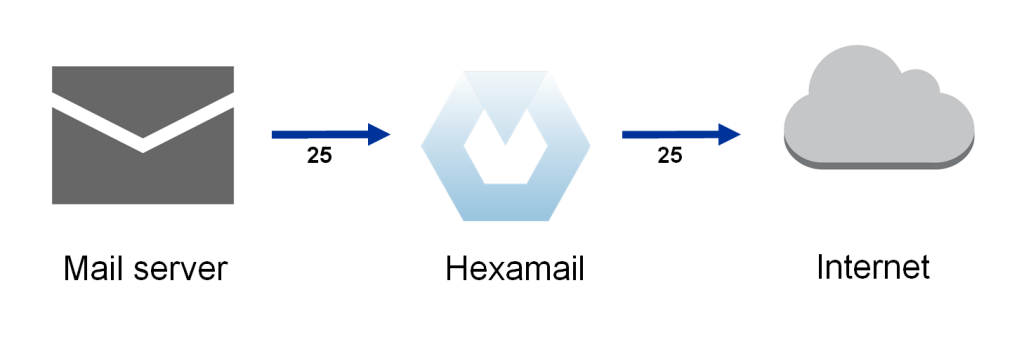
- An outbound send connector is also created in Exchange called "Hexamail Outbound" and this sends outbound email back to Hexamail for outbound processing such as automatic whitelisting, antivirus filtering and adding disclaimers
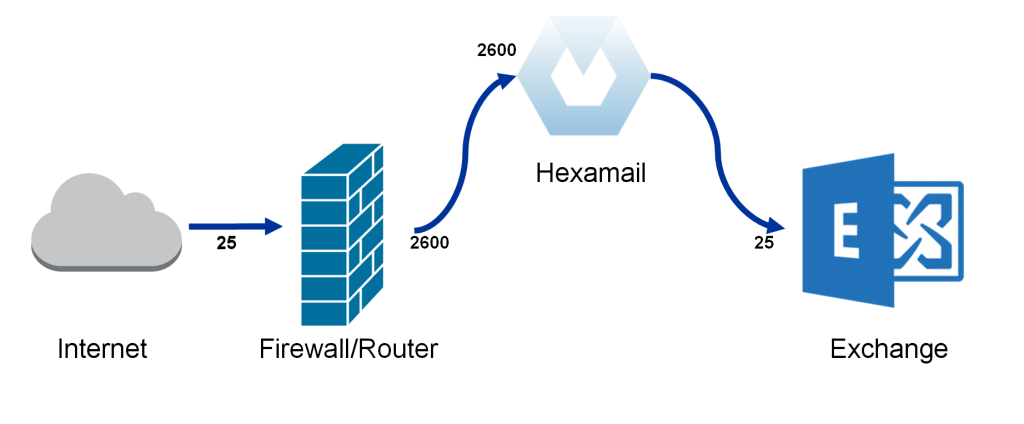
- If for any reason the default setup flow shown above is not desirable or does not work for you then you can also setup Hexamail as shown in the next diagram. This allows Hexamail to coexist on the Exchange server but does not change any existing connectors and wont disrupt any existing 3rd party apps that are trying to send email via Exchange. Simply install Hexamail, skip the Exchange integration and then change the Hexamail SMTP Server/Network port to 2600 and press apply. Then change your firewall or router rule to route incoming SMTP (TCP port 25) traffic to the Hexamail machine on port 2600
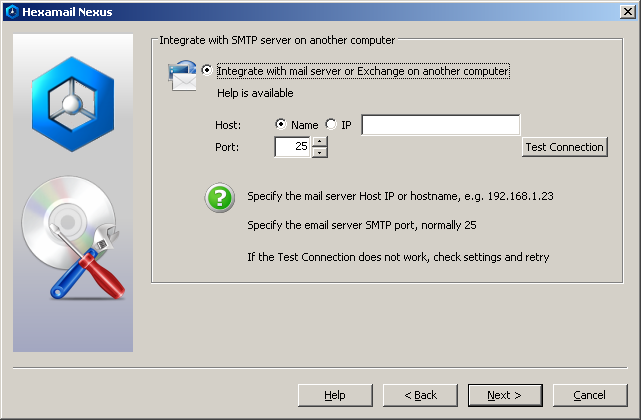
- If Hexamail is on a machine other than your Exchange server or mailserver you can configure your email server settings. This is the IP address and port of your mailserver. Use the Test Connection button to verify the settings
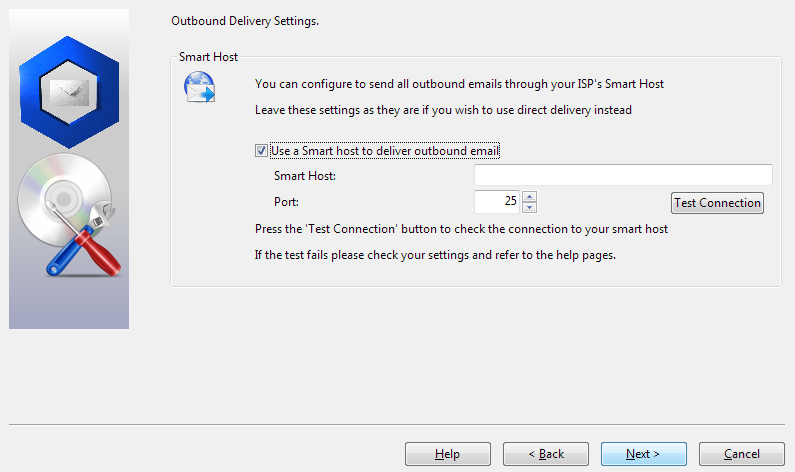
- Configure your outbound server settings. Hexamail needs to send email to recipients that do not have local mailboxes on your mailserver. For example it may need to send a notification or alert that there was a problem delivering email to a particular local mailbox. To send these email Hexamail needs to know the hostname or IP address and port of your smarthost. If your ISP requires you send email through their server then you need to specify that server here. If you wish to send directly to other mailservers of the external recipients then leave this blank or uncheck the checkbox. Use the Test Connection button to verify the settings
- Other settings such as authentication, rate limits etc can all be configured using the Administration console which will open when you click Finish on the setup wizard.


Configuring Hexamail POP3 Downloader
You can configure using a remote Windows administration GUI, using the Web Administration or by editing the configuration file directly.
The configuration settings are the same as in the Windows Administration and you can use the same help file to read about the various options in the Administration sections here: Hexamail POP3 Downloader Help
In the WebAdmin press the help button on the page you are using to see help relating to that specific page of settings.
Alternatively you can configure Hexamail settings directly in the configuration file as per the instructions in the Configuration section here: Hexamail POP3 Downloader Help
Managing
Once installed and initially configured, Hexamail is very easy to manage with clearly laid out settings, log files and email statistics/reporting. Just click on any section to open that section of the included administration app and click on a page to edit the settings for a given part of a module.
Hexamail also provide a mailserver with built in antispam capabilities Hexamail Server.