Guide to setting up Hexamail POP3 Downloader on LINUX
How to setup Hexamail POP3 Downloader on LINUX
This is a guide to setting up your own email connector on a LINUX machine.
Let's break the guide into some easy steps:
Preparing
You will need:
- - a computer with plenty of diskspace (>2GB) for storing email queues, log files, statistics and email
- - a 64bit LINUX operating system (for example Centos 5 or 6, Ubuntu, RedHat etc) (we can supply 32bit builds on request)
- - a permanent/reliable connection to the Internet
Prerequisites
You will need:
- OpenSSL 1.0.2. Check your version with openssl version
- Install Openssl with yum install openssl
- Update Openssl with yum update openssl
- Root access or access allowing use of ports below 1024 for default SMTP etc
Installing
Next you need to download the required software and copy it to your chosen computer.
- 1) Download Hexamail POP3 Downloader and save the tar.gz file and license on the computer
- 2) Unpack the hexamailpop3downloader.tar.gz file using the command
- 3) This creates a subfolder called hexamailpop3downloader/ in which Hexamail will run. You can move this folder wherever you wish at this point
- 4) Switch to the extracted folder
- 5) View the INSTALL text file for up to date instructions on your version of the software
Configuring Essential Settings
Now you can begin configuring Hexamail POP3 Downloader. After some initial steps you can use the webadmin to configure the rest of the settings
- 1) Copy the file hexamailpop3downloader.cfg.initial to hexamailpop3downloader.cfg
- 2) Edit the file hexamailpop3downloader.cfg
- 3) Fill in all the required settings listed in the file
Running for the first time
Now you can run Hexamail for the first time
- 1) Switch to the root user. This is required to allow Hexamail to use the ports required for email (port numbers under 1024)
- 2) Run the script ./start.sh provided with the software to start the Hexamail service
- 3) Verify there are no problems with the startup by checking the Hexamail POP3 Downloader log. It should eventually say Starting processing...
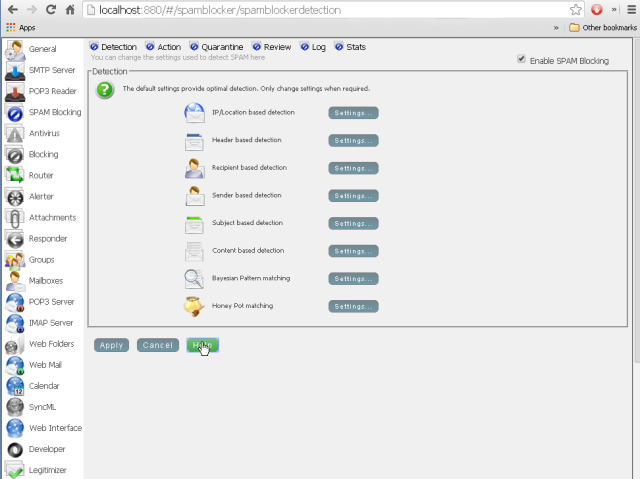
- 4) You are now ready to connect to the webadmin and configure the other settings. To do this open a browser to http://yourservername:880/ If it is on this server use this link webadmin
Running as a daemon or systemd service
To get Hexamail to run on start up or as a daemon (systemd service) you need to do the following.
First edit the startup script start.sh to contain the folder Hexamail is installed in by changing the following line:
/etc/systemd/system/hexamailpop3downloader.service
Edit this file and make the contents as follows:
You can now start and stop Hexamail using the command(s):
Configuring Hexamail POP3 Downloader
You can configure using a remote Windows administration gui, using the Web Administration or by editing the configuration file directly.
The configuration settings are now the same as in the Windows Administration and you can use the same help file to read about the various options in the Administration sections here: Hexamail POP3 Downloader Help
In the WebAdmin press the help button on the page you are using to see help relating to that specific page of settings.

Alternatively you can configure most of Hexamail using the configuration file directly using the instructions in the Configuration section here: Hexamail POP3 Downloader Help
Connecting to Hexamail POP3 Downloader
Hexamail POP3 Downloader is a full-featured connector and can offer various services to email and calendar clients.
Here is a list of services and the ports that need to be opened on your firewall/router to access each service
| Service | Protocol | Port | Module | Description |
|---|---|---|---|---|
| Send/Recv Mail | SMTP | 25 | Used to send email to your server by other servers and send outbound email from email clients. NOTE some ISPs will block this port so clients may need to send via the ISP provided smarthost/smtp server or use SSL or an alternative SMTP port | |
| Send/Recv Mail | SMTP (SSL) | 465 | Used to send outbound email from email clients securely. Use the SSL setting in your mail client and specify port 465 if your ISP is blocking port 25 | |
| Remote Administration | HTTP | 23004 | Used for remote administration using the Windows Administration console | |
| Web Administration | HTTP | 880* | Used for remote administration using the Web Administration | |
| Developer Access | HTTP | 1880* | Developer | Used for developer access via REST/json from languages such as Javascript, Python, .net etc. |
In your firewall you should allow incoming TCP connections for each port listed that you require, and in your Router/NAT device setup a rule to forward TCP traffic on the listed ports to the computer running Hexamail
* As configured in your configuration file or administration interface, default settings are shown