Redacting Outlook email
Redacting Outlook email
The European General Data Protection Regulations (GDPR) make email redaction software a more critical investment than ever before.
Redaction can be a laborious task, and it is much better to automate the process as much as possible using desktop software or an online service.
Hexamail provides both desktop software and an online service to automate the redaction of email. This saves you effort, time, and money, and quickly provides a great return on investment.
Online Email Redaction Service
Ideal for quick redaction jobs, one-off requirements and when you have the pst/msg/text or email files and just need to redact them.
Desktop Email Redaction Software
Runs as software on desktop computers on your local network. Great for any very large redaction jobs requiring many gigabytes of PST data that needs to be filtered and searched prior to redaction.The online service guides you through the redaction process step by step. Lets work through an example with Hexamail Flow, the desktop software for email redaction.
Importing an email set for redaction
Often the first stage of any Subject Data Access Request email redaction process is to extract all relevant email from a larger database or set of email. This can be done using standard Microsoft Exchange search and Export tools, Outlook Email Client, or an email archive tool such as Hexamail Vault (that can import all email from Exchange and facilitate rapid and efficient search and export of email in standard formats). Once exported you should have a PST file (from Exchange or Outlook) or a folder or zip containing a multiple MIME or text format email files. This needs to be imported into Hexamail Flow. In Hexamail you can import the email into a folder, the local account, or into a special "Subject Data Access Request" folder. The Subject Data Access Request folder is a special folder that also contains a single contact record relating to the subject of the request. The subject contact details are used as a "white list" of terms to not be auto-redacted.
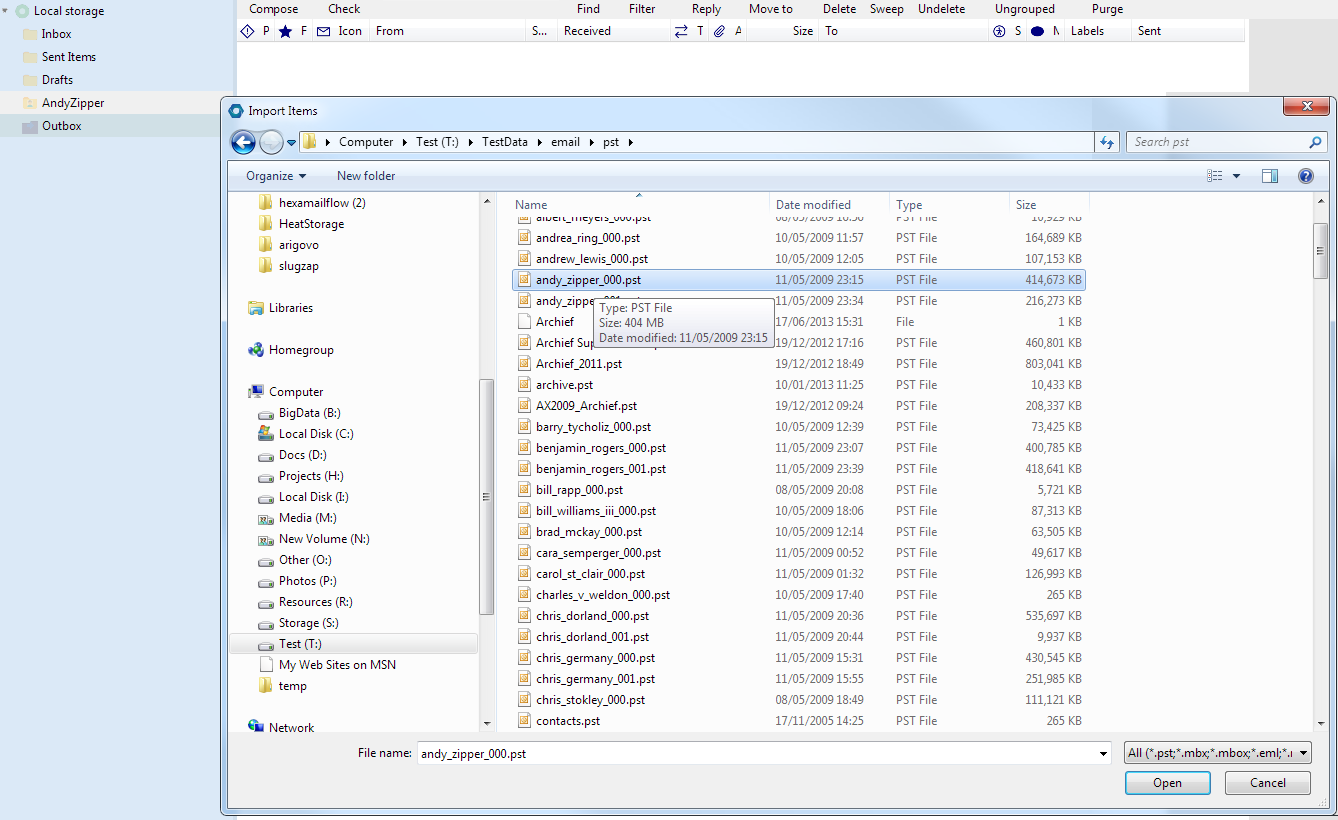
If you choose to create a Subject Data Access Request folder the subject contact will automatically be created, and the import pop up box will prompt for you to locate the PST file you wish to import. Once you have chosen to import it you will be prompted whether to create the folders found within the PST file or just import all email into the top-level folder.
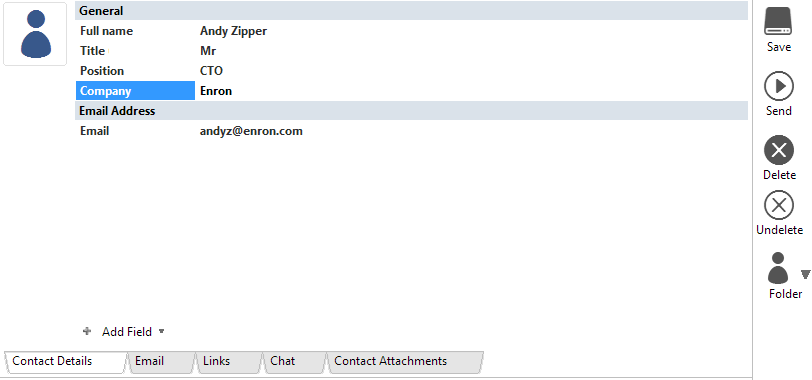
Locate the subject contact record window and fill out the contact details for the subject making the Data Access Request. These details will NOT be redacted automatically from the email and attachments that are to comprise the Subject Data Access Request
Save the new Subject Data Access contact record
Filtering the email list
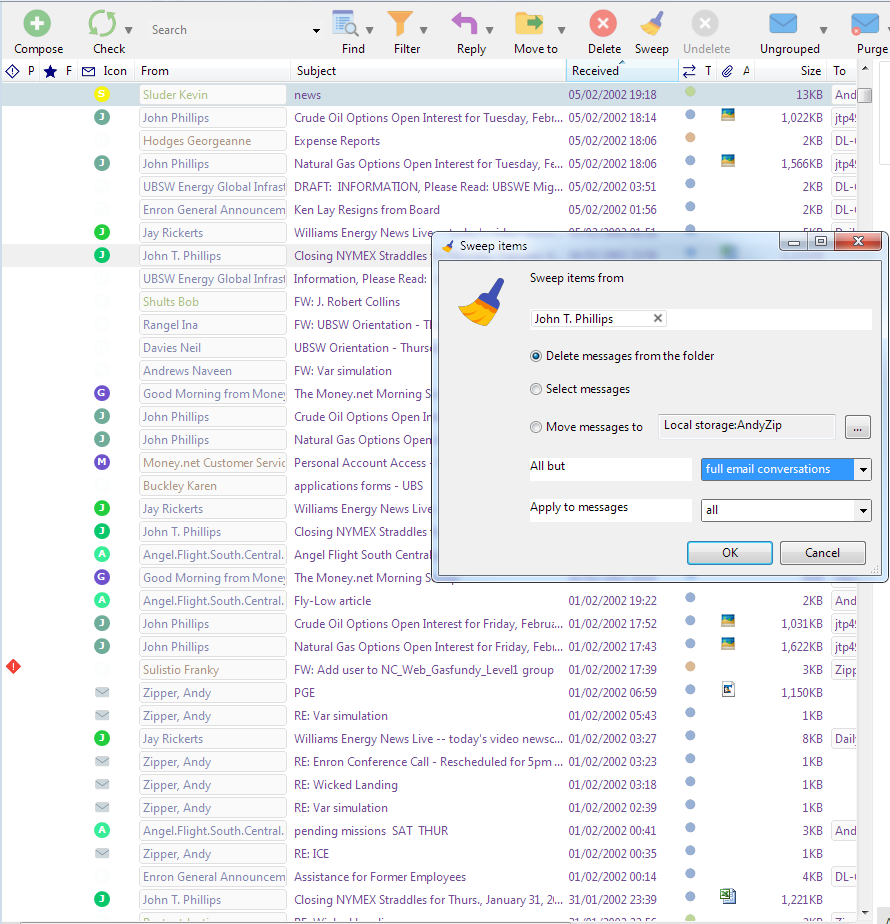
The next step is to filter the superset of email down into the list of email that need to be provided to the subject as part of the Subject Data Access Request. This can be done in same way as with any email client. You can select multiple email and delete, flag/ sort or hide email. You can pin email to the top of the list while you work. There is also a powerful built-in "Sweep" function to remove all email from specific senders or remove duplicate email chains from within email conversations. Using sweep you can delete all emal that are part of other email threads, and have no unique attachments in a single click.
Once you have the final filtered list of email and attachments you need to redact you can start redacting each email content and any attachments. This process is semi-automated but a quick manual inspection is required to ensure all sensitive material has been correctly redacted.
Redacting the email content
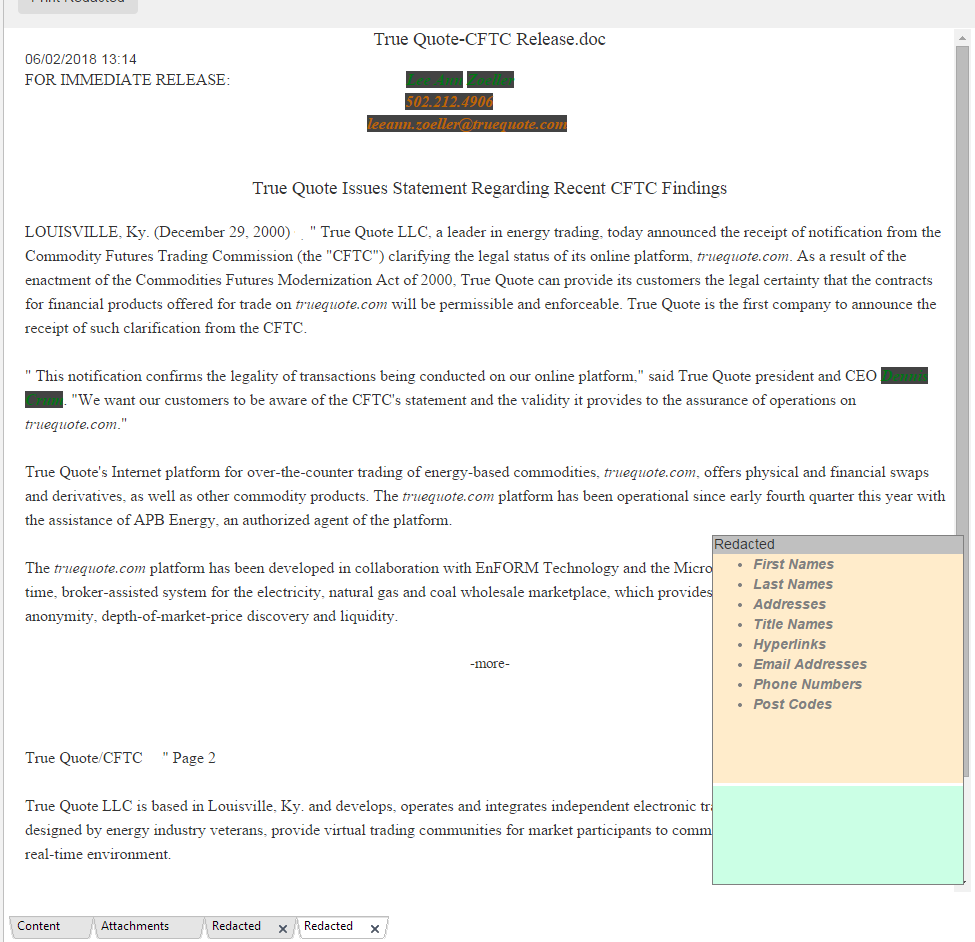
Open each email by double clicking to open as a new window, or if you prefer to use the preview pane, then click on each email and it will automatically be displayed in the preview pane. Once in the preview pane you can just right click the content and choose "redact" or click the redact button in the toolbar on the right hand side

The automatic redaction will redact all phone numbers, post codes, addresses, email addresses, web links, first and last names from the content. In the redaction page you can still read the text that has been redacted, but don't worry: on printing the content is entirely blanked out. If something should not be redacted click on the redacted text and choose "un redact". if text is still present that needs redacting right click the word (or make a selection) and right click and choose "redact". You can also double click any word to toggle it's redaction. The floating window in the bottom right shows all the words currently redacted or white listed (never to be redacted for this subject request). The window can be picked up and moved if required.
Once you have completed the redaction process you can click Print to print the redacted content or simply move on to the next email, the redacted content will be automatically stored alongside the original email and shown whenever you reopen the email. If you want to remove the redacted content just click the small close button on the redacted tab at the bottom. Your redactions for this email will be removed.
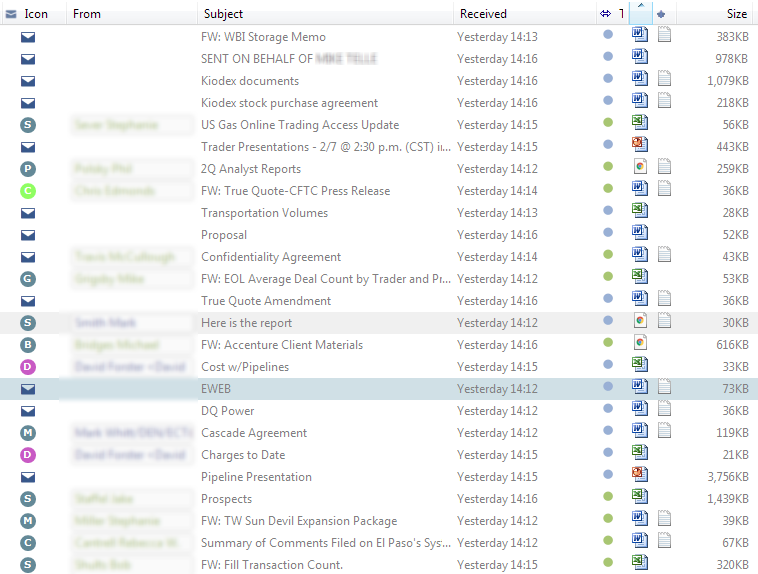
An email with redacted content is shown with a special redacted icon next to it in the email list so you know which email you still need to process and which have already been redacted
Redacting email attachments
You can redact the content of any email attachments in the same way. Just click on an email to display it in the preview (or double click to open it in a new window). Select the attachment to redact from the Attachments tab and right click and choose "redact". A HTML version of the PDF/Word/Excel or Powerpoint document is shown and can be redacted in the exact same way as the email content. Redacted versions of attachments are shown as additional redact tab and stored alongside the email for future viewing or printing. Again you can choose to print the redaction right away or simply move on to the next email to carry on redacting content.
Pritning out redacted content
Once you have redacted all the content required you can select multiple email in the list in the usual way (hold control down when clicking an email to select it as well, or hold shift down to select all email from the previous selection to the newly clicked email). Once selected right-click the selected email and choose "Print Redacted". This will check all email have redacted versions and print those redactions. You can optionally choose to open all the email that are missing redacted version in order to perform the redaction before printing.