Guide to sending email using React JS
How to send email using React JS
This is a guide to setting up an email sending server and API using Hexamail POP3 Downloader to allow sending email from a React JS app. The advantage of using Hexamail POP3 Downloader is that ther eare no per-message fees, no ongoing subscription and no GDPR related privacy issues as the server runs on your in house or hosted Windows/Linux server and is a single one-time permanent license.
Let's break the guide into some easy steps:
Configuring the sending server
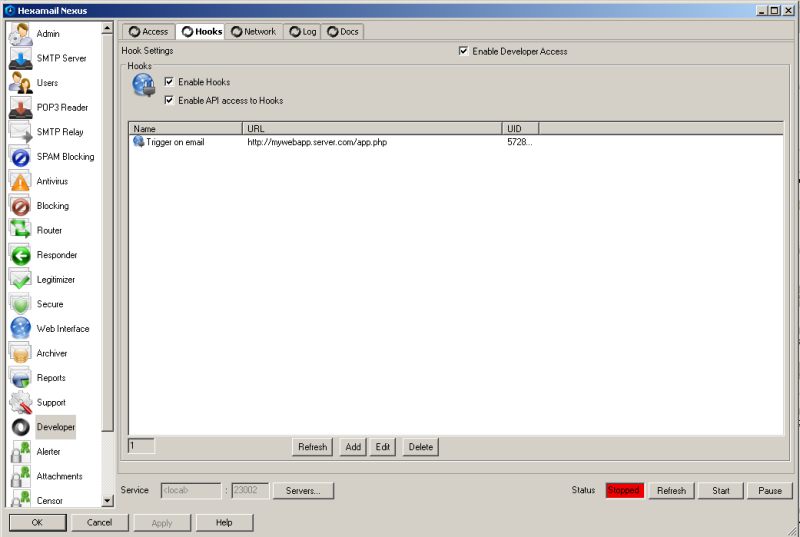
Now you can begin configuring Hexamail POP3 Downloader.
- Go to the Developer options sheet in the administration console
- Press Add... to add a new webhook
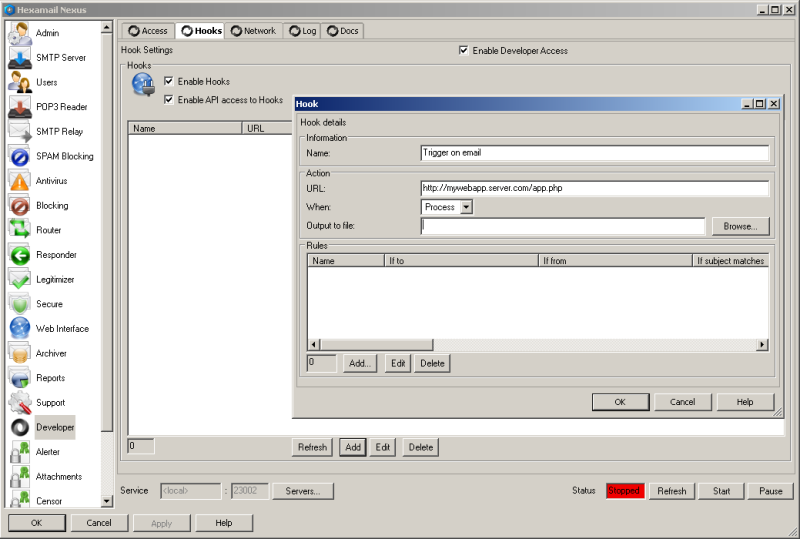
- Specify a name and URL for your webhook. Currently this will trigger on every email processed. We will add some rules to make it only trigger on specific email:
- Press Add to add rules to your webhook. Each rule ANDs the various restrictions but any rule can be matched to trigger the webhook. In this way you can have AND and OR clauses on yoru webhook. In this example we simply trigger on a specific email address in the From field of the email. You can trigger on multiple addresses or use wildcards like * (to match multiple characters) and ? to match any singl character.
- Once done press OK to exit the rule, and OK to exit the hook and then remember to press APPLY once all your rules and hooks are added to send the new configuration to the server